Transfer
Usage
Use this window to transfer the data after all of the data is selected.
All of the objects which have records selected for transfer are displayed under the Pending node. Select an object node to view the selected records.
Click the "Start Transfer Data" button to transfer the pending records to the destination.
The Transfer operation performs the following actions:
- Create External IDs & Disable Validations
- Transfer Records
- Re-enable Validations
Open the Log window to view detailed operation statuses and any error messages by click the "Log Window" button during or after the transfer operation.
Click the "Save Error Records" button to save the erroneous records to files. An individual file will be created for each object containing erroneous records. These files are formatted according to the import file format and can be used at a later time by using Include from File... and Load Filters from Files...
Completed
Objects under the Completed node will display a special "New Id" column containing the Id of the record created/modified on the destination org.
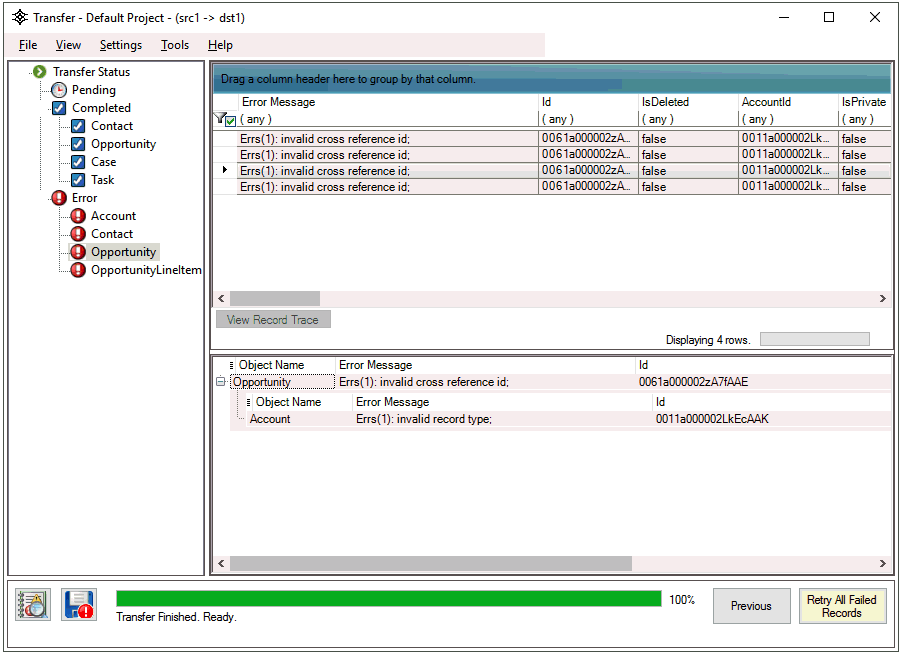
Error
Objects under the Error node will display a special "Error Message" column containing the reason why the record could not be transferred to the destination. Some records may contain multiple error messages in which case each will be separated by a semicolon. See the Troubleshooting Failed Records topic for details on resolution.
Use the tree list on the bottom-half of the window to view parent records which may have caused the currently selected record to fail.
After a transfer is completed, if there are erroneous records, the user can click the "Retry All Failed Records" button start the transfer process again only for the records which were erroneous during the previous attempt.