Tasks
Managing Tasks
The task tab gives users the ability to view ALL, PENDING, and COMPLETED tasks.
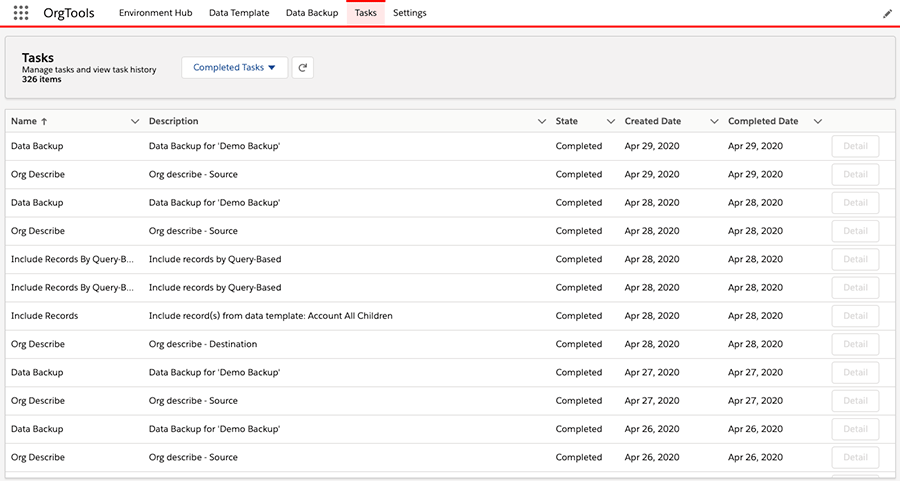
Users can view the type of task (Org Describe, Disable Validations, Enable Validations, Include Records, Data Copy, or Data Backup), description, state, created date, completed data, and details if it is a data copy task.
Use the drop down to toggle between ALL, PENDING, and COMPLETED tasks.

All Tasks
This drop down will show all tasks (PENDING, FAILED, and COMPLETED) performed by the user throughout the history of using the application.
Completed Tasks
This drop down will show all the completed tasks performed by the user throughout the history of using the application.
Pending Tasks
This drop down will show all the pending tasks currently running inside the application.
Detail Page
User can click the Detail button for data copy tasks to view the progress of pending data copies as well as view completed and failed records.
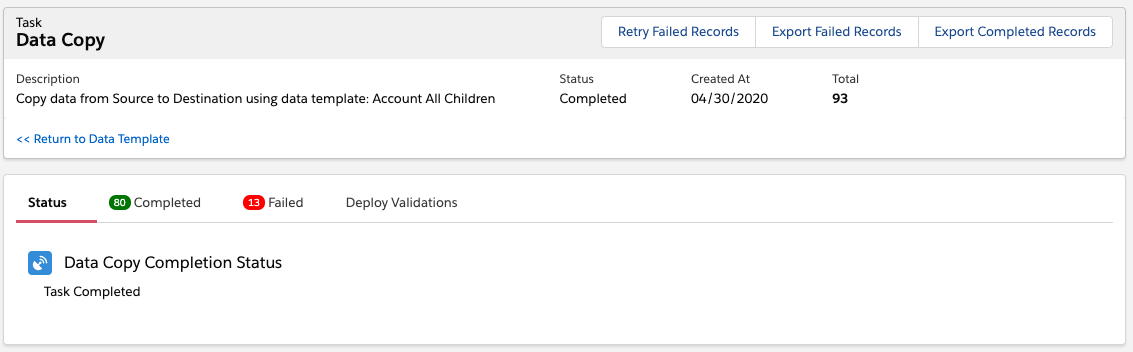
The header banner will provide information surrounding the data copy.
The description showcases a combination of the source and target orgs with the data template being used.
The status will display the current stage of the data copy, either In Progress, Completed, or Failed.
Created Date shows the date that the data copy ran.
The final value is the total record count for the data copy task.
Return to Data Template
This button below the descriptions will take the user back to the data template to make any adjustments. User can go back to the data template to exclude fields, add data translations, or manage validations to resolve error messages for failed records.
Retry Failed Records
This button will allow users to retry any failed records after a data copy task is completed. The app stores the record IDs of the failed records allowing users to retry failed records shortly after the data copy task completed or days later.
Users can select all objects to retry or select individual objects.
Important: The Retry Failed Records will mirror the original data copy when it comes to disabling the validations. If the original data copy disabled the validations, then the retry will disable them as well. Same if user told the app not to disable the validations during the original data copy.
Export Failed Records
Click this button to export all failed records to an easy to read CSV file.

Click the blue text to download the CSV file.
Export Completed Records
Click this button to export all completed records to a CSV file.
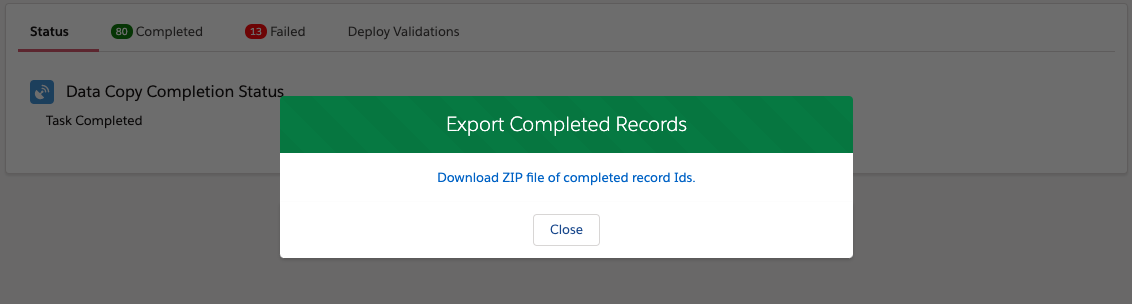
Click the blue text to download the CSV file.
Status Tab
This tab shows a progress bar to give users information on the advancement of the data copy task.
This tab will showcase the logs as well. Users can see the events performed by the application as it migrates data between Salesforce environments.
Completed Tab
The completed tab shows the records that were copied into the target org. The records are broken down by object. User can use the drop-down to toggle between objects.
The data table displays the field values populated into the target org. The value in the ID field is the ID inside the destination. Users can copy and paste this ID into the destination to locate the record.
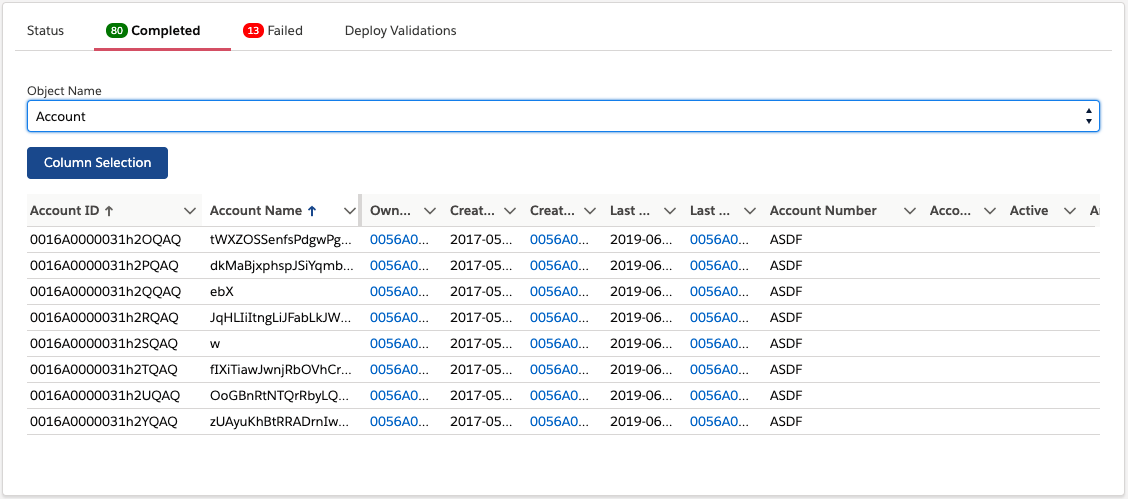
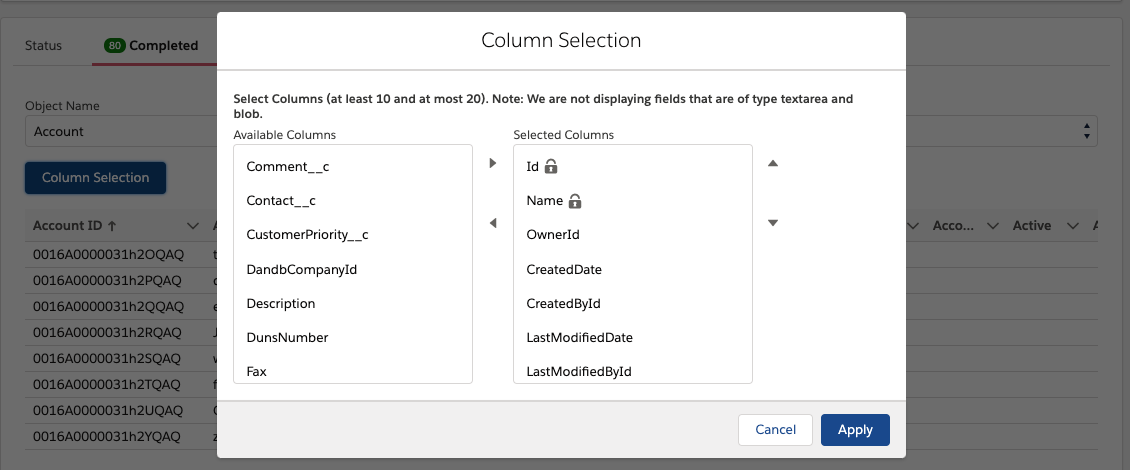
Column Selection
The Column Selection button lets users changes the columns in the data table. The data table will display anywhere between 10-20 columns.
The left list is all the available field for that object. The right list are the selected fields that will display on the data table. Use the left and right arrow to move fields between the two lists. Use the up and down arrow next to the select fields to move field up or down to determine the order in which the columns will be displayed on the data table.
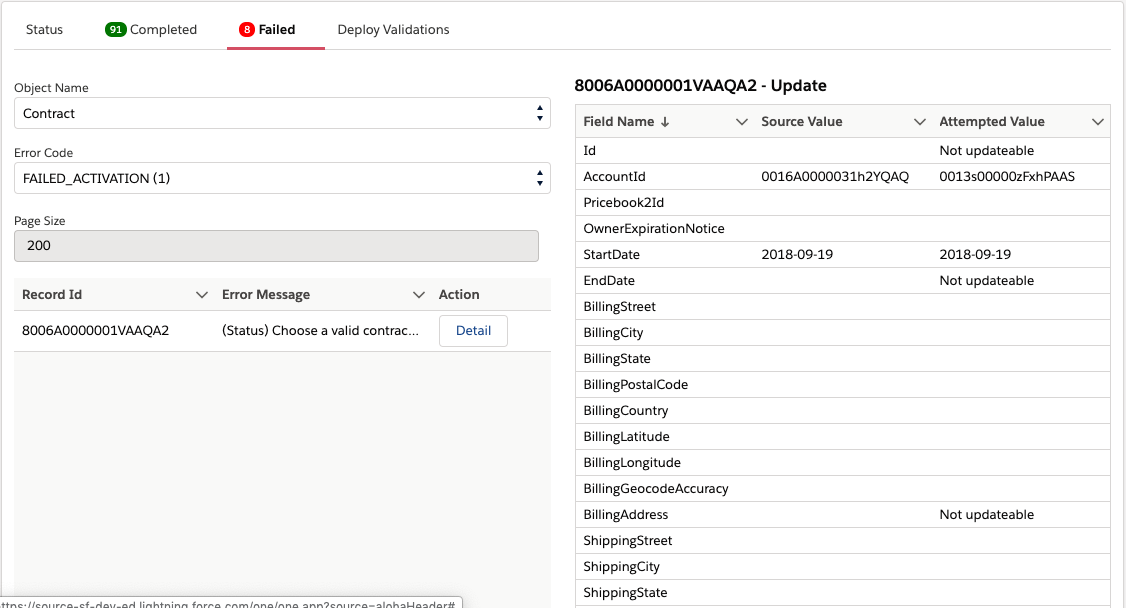
Failed Tab
The failed tab displays the records that failed during the data copy task.
The records are segmented by Object and error code. User can use the drop-down list to toggle between objects and error codes.
The error messages are the responses returned from Salesforce as it tried to create the records in the destination.
The table on the bottom left displays the individual records with its record ID and error message. User can click the Detail button to populate the right table.
The table on the right side of the screen provides a side by side comparison between the source field values and the values the app attempted to populate into the destination for the specific record.